
Interaction through a remote control
Introduction
This example will build on our Hello world example and will demonstrate the interaction of HbbTV applications with remote control. Remote control keys supported within applications are set within the ETSI TS 102 796 V1.1.1 standard document, chapter 10.2.2 User input:
| Button (for conventional remote controls) | Key event | Status |
|---|---|---|
| 4 colour buttons (red, green, yellow, blue) | VK_RED, VK_GREEN, VK_YELLOW, VK_BLUE | Mandatory |
| 4 arrow buttons (up, down, left, right) | VK_UP, VK_DOWN, VK_LEFT, VK_RIGHT | Mandatory |
| ENTER or OK button | VK_ENTER | Mandatory |
| BACK button | VK_BACK | Mandatory |
| Number keys | VK_0 to VK_9 inclusive | Mandatory |
| Play, stop, pause | VK_STOP and either VK_PLAY and VK_PAUSE or VK_PLAY_PAUSE | Mandatory |
| Fast forward and fast rewind | VK_FAST_FWD VK_REWIND | Mandatory |
| TEXT or TXT or comparable button | Not available to applications | Mandatory |
| 2 program selection buttons (e.g. P+ and P-) | Not available to applications | Optional |
| WEBTV or comparable button | Not available to applications | Optional |
| EXIT or comparable button | Not available to applications | Optional |
Beware that the applications themselves define which key events they request to receive. This is done by setting the KeySet object to a bitwise mask constructed from the constants in the following table:
| Constant name | Numeric Value | Use |
|---|---|---|
| RED | 0x1 | Used to identify the VK_RED key event. |
| GREEN | 0x2 | Used to identify the VK_GREEN key event. |
| YELLOW | 0x4 | Used to identify the VK_YELLOW key event. |
| BLUE | 0x8 | Used to identify the VK_BLUE key event. |
| NAVIGATION | 0x10 | Used to identify the VK_UP, VK_DOWN, VK_LEFT, VK_RIGHT, VK_ENTER and VK_BACK key events. |
| VCR | 0x20 | Used to identify the VK_PLAY, VK_PAUSE, VK_STOP, VK_NEXT, VK_PREV, VK_FAST_FWD, VK_REWIND, VK_PLAY_PAUSE key events. |
| SCROLL | 0x40 | Used to identify the VK_PAGE_UP and VK_PAGE_DOWN key events. |
| INFO | 0x80 | Used to identify the VK_INFO key event. |
| NUMERIC | 0x100 | Used to identify the number events, 0 to 9. |
| ALPHA | 0x200 | Used to identify all alphabetic events. |
| OTHER | 0x400 | Used to indicate key events not included in one of the other constants in this class. |
Implemented functionality
The example application, once started, shall demonstrate a typical red button scenario, when the application at first only reacts to the red button which, when pressed, invokes the full application that requests to receive more key events. To keep this example minimal, we will not use an image for the call-to-action banner:
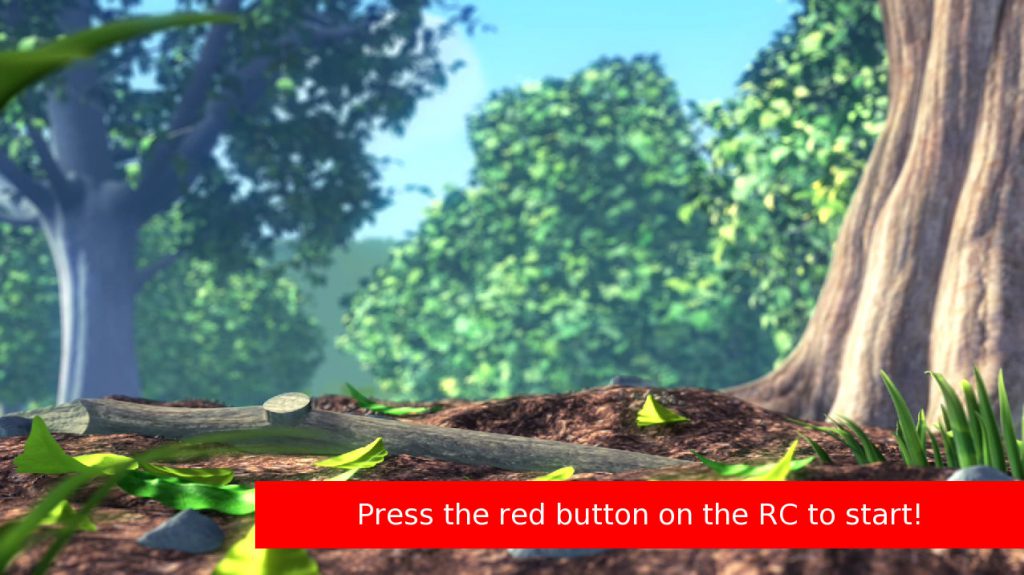
In this state, the app receives only the red button event and reacts to it by showing the full application scene:
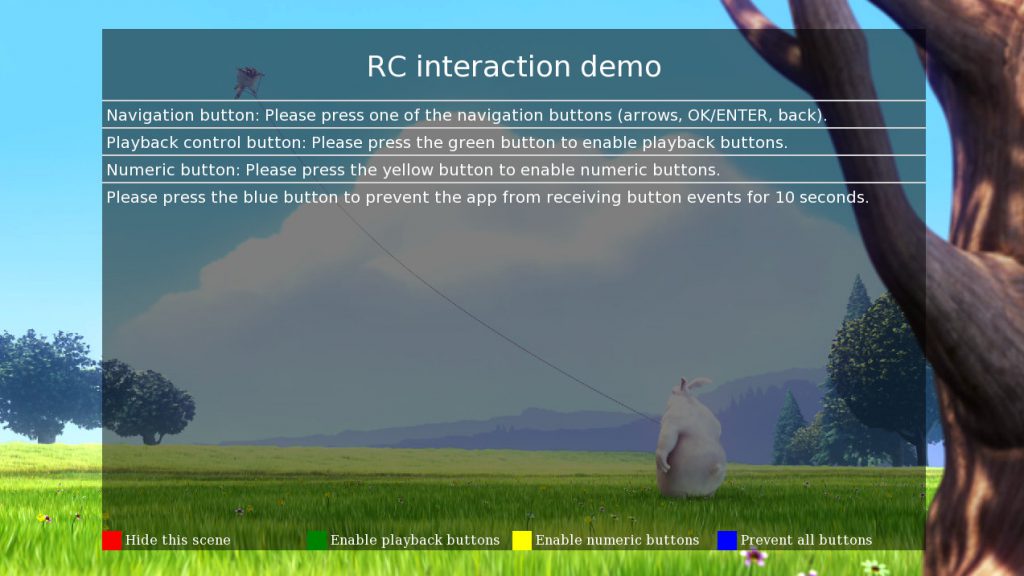
When full application scene is active, the app will react to all coloured RC buttons as follows:
- RED BUTTON to hide the scene and go back to call-to-action scene
- GREEN BUTTON to enable / disable reception of playback RC buttons (PLAY / PAUSE / STOP / FFWD / RWD) by the app
- YELLOW BUTTON to enable / disable reception of numeric RC buttons (0 … 9) by the app
- BLUE BUTTON to prevent reception of all RC buttons by the app for 10 seconds
When the full application scene is active, the app will also show the last RC button pressed on screen.
Source code
Full source code is available here: https://github.com/HbbTV-Association/Tutorials/tree/main/rc-interaction
The code consists of:
- rc-interaction.html HTML document holding the application scene
- rc-interaction.css CSS document holding the application scene styling
- rc-buttons.js JavaScript file which defines global variables for RC button events and 2 utility functions
- rc-interaction.js JavaScript file holding the application logic
rc-interaction.html
Application HTML document rc-interaction.html starts off as a “usual” HbbTV app (see Hello world example):
<!DOCTYPE html PUBLIC "-//HbbTV//1.1.1//EN" "http://www.hbbtv.org/dtd/HbbTV-1.1.1.dtd">
<html xmlns="http://www.w3.org/1999/xhtml">
<head>
    <title>RC interaction demo app</title>
    <meta http-equiv="Content-Type" content="application/vnd.hbbtv.xhtml+xml; utf-8" />
    <link rel="stylesheet" href="rc-interaction.css" />
    <script type="text/javascript" src="rc-buttons.js"></script>
    <script type="text/javascript" src="rc-interaction.js"></script>
</head>

<body onload="start();">
    <div>
        <object type="application/oipfApplicationManager" id="applicationManager"> </object>
    </div>
Observe that 2 JS documents are loaded:
- rc-buttons.js which defines global variables for RC button events and 2 utility functions
- rc-interaction.js which contains the application logic
The onload attribute of the body tag calls the app entry function start(). Document body also includes the application/oipfApplicationManager embedded object which is used within application logic in order to acquire the Application object, as set by standard.
The rest of the rc-interaction.html document contains main application scene within the safe area as recommended by the standard and a separate div outside of safe area containing the red button call to action notification:
<!-- we shall define a safe area for the main scene -->
<div class="safe_area" id="app_area">
  <!-- title -->
  <div class="title_text">
    RC interaction demo
  </div>
  <!-- status -->
  <div class="status_text">
    Navigation button:
    <span id="navigation_field">
    </span>
  </div>
  <div class="status_text">
    Playback control button:
    <span id="playback_field">
    </span>
  </div>
  <div class="status_text">
    Numeric button:
    <span id="numeric_field">
    </span>
  </div>
  <div class="status_text" id="prevent_field">
  </div>
  <!-- bottom legend -->
  <div class="bottom_legend">
    <div class="legend_cell">
      <div class="legend_button_red">
      </div>
      <span class="legend_text">
        Hide this scene
      </span>
    </div>
    <div class="legend_cell">
      <div class="legend_button_green">
      </div>
      <span class="legend_text" id="toggle_playback_field">
      </span>
    </div>
    <div class="legend_cell">
      <div class="legend_button_yellow">
      </div>
      <span class="legend_text" id="toggle_numeric_field">
      </span>
    </div>
    <div class="legend_cell">
      <div class="legend_button_blue">
      </div>
      <span class="legend_text">
        Prevent all buttons
      </span>
    </div>
  </div>
</div>
<div class="red_button_style" id="red_button_notification_field">
  Press the red button on the RC to start!
</div>
</body>
</html>
In order to keep this example as simple as possible the call-to-action banner (Press the red button on the RC to start!) is implemented as text.
rc-interaction.css
The rc-interaction.css starts with HbbTV specifics explained in the Hello world example.
/* general settings related to Hbb */
body
{
    /* transparent background */
    background-color: transparent;
    /* we explicitly set the size of the body element */
    width: 1280px;
    height: 720px;
    overflow: hidden;
    /* white text in font supported by terminals */
    color: white;
    font-family: sans-serif;
}
/** application/oipfApplicationManager embedded object style  */
object#applicationManager
{
    position: absolute;
    left: 0px;
    top: 0px;
    width: 0px;
    height: 0px;
}
/** safe area as recommended by standard */
div.safe_area
{
    position: absolute;
    left: 128px;
    top: 36px;
    width: 1024px;
    height: 648px;
    /** set background color and alpha */
    background-color: rgba(0, 0, 0, .5);
}
The difference in this example is that initial visibility state of safe area (containing main application scene) is set to hidden since on application start only red button call-to-action notification is visible:
/* set application area invisible as initial state (we need to press the red button, so application scene shows) */ div#app_area { visibility: hidden; }
Red button call-to-action notification div and text style (contains nothing specific for HbbTV):
/* set red button div style */
div.red_button_style
{
    position: absolute;
    left: 320px;
    top: 600px;
    width: 960px;
    height: 84px;
    /* red background */
    background-color: red;
    /* centered text */
    font-size: 36px;
    text-align: center;
    line-height: 84px;
}
Main scene and bottom legend style concludes the CSS (contains nothing specific for HbbTV):
/* set title text style */
div.title_text
{
    padding-top: 25px;
    padding-bottom: 20px;
    font-size: 36px;
    text-align: center;
}
/* set status text style */
div.status_text
{
    padding-left: 5px;
    padding-top: 5px;
    padding-bottom: 3px;
    font-size: 20px;
    border-top: 2px solid #d3d3d3;
}
/* set bottom legend style */
div.bottom_legend
{
    position: absolute;
    top: 624px;
    width: 1024px;
    height: 24px;
}
/* set bottom legend cell style */
div.legend_cell
{
    width: 250px;
    height: 24px;
    display: inline-block;
}
div.legend_button_red {
    width: 24px;
    height: 24px;
    display: inline-block;
    background-color: red;
}
div.legend_button_green {
    width: 24px;
    height: 24px;
    display: inline-block;
    background-color: green;
}
div.legend_button_yellow {
    width: 24px;
    height: 24px;
    display: inline-block;
    background-color: yellow;
}
div.legend_button_blue {
    width: 24px;
    height: 24px;
    display: inline-block;
    background-color: blue;
}
/* set bottom legend cell style */
span.legend_text {
    position: relative;
    top: -7px;
    font-size: 16px;
}
rc-buttons.js
The rc-buttons.js defines global variables for RC button events:
//
//  define RC button globals for terminal
//
if (typeof(KeyEvent)!=='undefined') {
    if (typeof(KeyEvent.VK_LEFT)!=='undefined') {
        var VK_LEFT = KeyEvent.VK_LEFT;
        var VK_UP = KeyEvent.VK_UP;
        var VK_RIGHT = KeyEvent.VK_RIGHT;
        var VK_DOWN = KeyEvent.VK_DOWN;
    }
    if (typeof(KeyEvent.VK_ENTER)!=='undefined') {
        var VK_ENTER = KeyEvent.VK_ENTER;
    }
    if (typeof(KeyEvent.VK_RED)!=='undefined') {
        var VK_RED = KeyEvent.VK_RED;
        var VK_GREEN = KeyEvent.VK_GREEN;
        var VK_YELLOW = KeyEvent.VK_YELLOW;
        var VK_BLUE = KeyEvent.VK_BLUE;
    }
    if (typeof(KeyEvent.VK_PLAY)!=='undefined') {
        var VK_PLAY = KeyEvent.VK_PLAY;
        var VK_PAUSE = KeyEvent.VK_PAUSE;
        var VK_PLAY_PAUSE = KeyEvent.VK_PLAY_PAUSE;
        var VK_STOP = KeyEvent.VK_STOP;
    }
    if (typeof(KeyEvent.VK_FAST_FWD)!=='undefined') {
        var VK_FAST_FWD = KeyEvent.VK_FAST_FWD;
        var VK_REWIND = KeyEvent.VK_REWIND;
    }
    if (typeof(KeyEvent.VK_BACK)!=='undefined') {
        var VK_BACK = KeyEvent.VK_BACK;
    }
    if (typeof(KeyEvent.VK_0)!=='undefined') {
        var VK_0 = KeyEvent.VK_0;
        var VK_1 = KeyEvent.VK_1;
        var VK_2 = KeyEvent.VK_2;
        var VK_3 = KeyEvent.VK_3;
        var VK_4 = KeyEvent.VK_4;
        var VK_5 = KeyEvent.VK_5;
        var VK_6 = KeyEvent.VK_6;
        var VK_7 = KeyEvent.VK_7;
        var VK_8 = KeyEvent.VK_8;
        var VK_9 = KeyEvent.VK_9;
    }
}
Key events for different RC buttons are defined in KeyEvent class, but we choose to define global variables, since we want to add support for key events on emulators running on computer browsers which receive input from a computer keyboard, which we do like so:
//
// if we failed, define RC button globals for browser emulator
//
if (typeof(VK_LEFT)==='undefined') {
 var VK_LEFT = 0x25;
 var VK_UP = 0x26;
 var VK_RIGHT = 0x27;
 var VK_DOWN = 0x28;
}
if (typeof(VK_ENTER)==='undefined') {
 var VK_ENTER = 0x0d;
}
if (typeof(VK_RED)==='undefined') {
 var VK_RED = 0x193;
 var VK_GREEN = 0x194;
 var VK_YELLOW = 0x195;
 var VK_BLUE = 0x196;
}
if (typeof(VK_PLAY)==='undefined') {
 var VK_PLAY = 0x50;
 var VK_PAUSE = 0x51;
 var VK_PLAY_PAUSE = 0x52;
 var VK_STOP = 0x53;
}
if (typeof(VK_FAST_FWD)==='undefined') {
 var VK_FAST_FWD = 0x46;
 var VK_REWIND = 0x52;
}
if (typeof(VK_BACK)==='undefined') {
 var VK_BACK = 0x8;
}
if (typeof(VK_0)==='undefined') {
 var VK_0 = 0x30;
 var VK_1 = 0x31;
 var VK_2 = 0x32;
 var VK_3 = 0x33;
 var VK_4 = 0x34;
 var VK_5 = 0x35;
 var VK_6 = 0x36;
 var VK_7 = 0x37;
 var VK_8 = 0x38;
 var VK_9 = 0x39;
}
This approach ensures that we always have a global variable defined for every key event. The rest of rc-buttons.js defines 2 utility functions:
- setKeyset(app, mask), which is used to set a KeySet mask (this is how applications define which key events they request to receive). This example application is built for maximum compatibility, so in order to support terminals implementing version 1.1.1 of the ETSI TS 102 796 standard the setKeyset(app, mask) function has to compensate for a change in OIPF DAE Application class private property name change to privateData (OIPF DAE specification version 1.1 to version 1.2);
- registerKeyEventListener(), which is used to invoke the callback function for processing RC button events (in our case it is the handleKeyCode(kc) function);
//
//  define utility functions for RC
//
var rcUtils = {
 MASK_CONSTANT_RED: 0x1,
 MASK_CONSTANT_GREEN: 0x2,
 MASK_CONSTANT_YELLOW: 0x4,
 MASK_CONSTANT_BLUE: 0x8,
 MASK_CONSTANT_NAVIGATION: 0x10,
 MASK_CONSTANT_PLAYBACK: 0x20,
 MASK_CONSTANT_NUMERIC: 0x100,
 setKeyset:function(app, mask) {
 try {             // try as per OIPF DAE v1.2
 app.privateData.keyset.setValue(mask);
 } catch (e) {
 // try as per OIPF DAE v1.1
 try {
 app.private.keyset.setValue(mask);
 }
 catch (ee) {
 // catch the error while setting keyset value
 }
 }
 },
 registerKeyEventListener:function() {
 document.addEventListener('keydown', function(e) {
 if (handleKeyCode(e.keyCode)) {
 e.preventDefault();
 }
 }, false);
 }
};
rc-interaction.js
The rc-interaction.js starts of with scene initialization implementation:
// scene implementation
var scene = {
 appObject:null,
 appAreaDiv: null,
 isAppAreaVisible: false,
 redButtonDiv: null,
 lastNavigationButtonPressed: null,
 lastPlaybackButtonPressed: null,
 lastNumericButtonPressed: null,
 shouldReactToPlaybackButtons: false,
 shouldReactToNumericButtons: false,
 timeout: 0,
 initialize: function(appObj) {
 this.appObject = appObj;
 this.appAreaDiv = document.getElementById('app_area');
 this.redButtonDiv = document.getElementById('red_button_notification_field');
 // register RC button event listener
 rcUtils.registerKeyEventListener();
 // initial state is app_area hidden
 this.hideAppArea();
 // render the scene so it is ready to be shown
 this.render();
 },
Followed by utility function used to show / hide main scene and retrieve the KeySet mask relevant for current state of main scene (numeric / playback RC buttons enabled or disabled):
 getRelevantButtonsMask: function(){
 // mask includes color buttons
 var mask = rcUtils.MASK_CONSTANT_RED + rcUtils.MASK_CONSTANT_GREEN + rcUtils.MASK_CONSTANT_YELLOW + rcUtils.MASK_CONSTANT_BLUE;
 // and navigation
 mask += rcUtils.MASK_CONSTANT_NAVIGATION;
 // add playback buttons if scene should react to them
 if (this.shouldReactToPlaybackButtons) {mask += rcUtils.MASK_CONSTANT_PLAYBACK;}
 // add numeric buttons if scene should react to them
 if (this.shouldReactToNumericButtons) {mask += rcUtils.MASK_CONSTANT_NUMERIC;}
 // return calculated button mask
 return mask;
 },
 showAppArea: function(){
 this.appAreaDiv.style.visibility = 'visible';
 this.redButtonDiv.style.visibility = 'hidden';
 this.isAppAreaVisible = true;
 // when shown, app reacts to all buttons relevant on the scene
 rcUtils.setKeyset(this.appObject, this.getRelevantButtonsMask());
 },
 hideAppArea: function(){
 this.appAreaDiv.style.visibility = 'hidden';
 this.redButtonDiv.style.visibility = 'visible';
 this.isAppAreaVisible = false;
 // when hidden, app reacts only to red button key press (show app scene)
 rcUtils.setKeyset(this.appObject, rcUtils.MASK_CONSTANT_RED);
 },
Main application scene is rendered using the render() function:
 render: function(){
 var navigationField = document.getElementById('navigation_field');
 var playbackField = document.getElementById('playback_field');
 var togglePlaybackField = document.getElementById('toggle_playback_field');
 var numericField = document.getElementById('numeric_field');
 var toggleNumericField = document.getElementById('toggle_numeric_field');
 var preventField = document.getElementById('prevent_field');
 // do navigation buttons
 if (this.lastNavigationButtonPressed === null) {
 navigationField.innerHTML = 'Please press one of the navigation buttons (arrows, OK/ENTER, back).';
 } else {
 navigationField.innerHTML = this.lastNavigationButtonPressed;
 }
 // do playback buttons
 if (this.shouldReactToPlaybackButtons) {
 if (this.lastPlaybackButtonPressed === null) {
 playbackField.innerHTML = 'Please press one of the playback buttons (trick play controls).';
 } else {
 playbackField.innerHTML = this.lastPlaybackButtonPressed;
 }
 togglePlaybackField.innerHTML = 'Disable playback buttons';
 } else {
 playbackField.innerHTML = 'Please press the green button to enable playback buttons.';
 togglePlaybackField.innerHTML = 'Enable playback buttons';
 }
 // do numeric buttons
 if (this.shouldReactToNumericButtons) {
 if (this.lastNumericButtonPressed === null) {
 numericField.innerHTML = 'Please press one of the numeric buttons (0 ... 9).';
 } else {
 numericField.innerHTML = this.lastNumericButtonPressed;
 }
 toggleNumericField.innerHTML = 'Disable numeric buttons';
 } else {
 numericField.innerHTML = 'Please press the yellow button to enable numeric buttons.';
 toggleNumericField.innerHTML = 'Enable numeric buttons';
 }
 // do prevent field
 preventField.innerHTML = 'Please press the blue button to prevent the app from receiving button events for 10 seconds.';
 },
When a user presses the BLUE RC button, all user input is disabled for 10 seconds. This is a demonstration of controlling the RC button events application will receive when setting the keyset value to different button masks. The waiting is implemented in timerTick() function like so:
 timerTick: function() {
 // check if timeout occurred
 if (scene.timeout > 0) {
 // not yet, display message
 var preventField = document.getElementById('prevent_field');
 preventField.innerHTML = 'The app shall not receive RC button events for ' + scene.timeout + ' seconds.';
 // decrement timeout and reschedule for 1 second
 scene.timeout--;
 setTimeout(scene.timerTick, 1000);
 } else {
 // timeout occurred, start reacting to buttons again
 rcUtils.setKeyset(scene.appObject, scene.getRelevantButtonsMask());
 // and rerender scene
 scene.render();
 }
 }
};
RC button events handling is implemented in handleKeyCode(kc) function:
// RC button press handler function
function handleKeyCode(kc) {
 try {
 var shouldRender = true;
 // process buttons
 switch (kc) {
 case VK_RED:
 // red button shows & hides the app scene
 if (scene.isAppAreaVisible) {
 scene.hideAppArea();
 } else {
 scene.showAppArea();
 }
 // no need to rerender complete scene
 shouldRender = false;
 break;
 case VK_GREEN:
 // green button toggles playback buttons
 if (scene.shouldReactToPlaybackButtons) {
 scene.shouldReactToPlaybackButtons = false;
 } else {
 scene.shouldReactToPlaybackButtons = true;
 scene.lastPlaybackButtonPressed = null;
 }
 rcUtils.setKeyset(scene.appObject, scene.getRelevantButtonsMask());
 break;
 case VK_YELLOW:
 // yellow button toggles numeric buttons
 if (scene.shouldReactToNumericButtons) {
 scene.shouldReactToNumericButtons = false;
 } else {
 scene.shouldReactToNumericButtons = true;
 scene.lastNumericButtonPressed = null;
 }
 rcUtils.setKeyset(scene.appObject, scene.getRelevantButtonsMask());
 break;
 case VK_BLUE:
 // blue button prevents user input for 10 seconds
 rcUtils.setKeyset(scene.appObject, 0); // this will prevent the app from receiving further RC button events
 scene.timeout = 10;
 scene.timerTick();
 // no need to rerender complete scene
 shouldRender = false;
 break;
 case VK_LEFT:
 // left button
 scene.lastNavigationButtonPressed = 'LEFT';
 break;
 case VK_RIGHT:
 // right button
 scene.lastNavigationButtonPressed = 'RIGHT';
 break;
 case VK_DOWN:
 // down button
 scene.lastNavigationButtonPressed = 'DOWN';
 break;
 case VK_UP:
 // up button
 scene.lastNavigationButtonPressed = 'UP';
 break;
 case VK_ENTER:
 // OK/ENTER button
 scene.lastNavigationButtonPressed = 'OK / ENTER';
 break;
 case VK_BACK:
 // BACK button
 scene.lastNavigationButtonPressed = 'BACK';
 break;
 case VK_PLAY:
 // PLAY button
 scene.lastPlaybackButtonPressed = 'PLAY';
 break;
 case VK_PAUSE:
 // PAUSE button
 scene.lastPlaybackButtonPressed = 'PAUSE';
 break;
 case VK_PLAY_PAUSE:
 // PLAY / PAUSE button
 scene.lastPlaybackButtonPressed = 'PLAY / PAUSE';
 break;
 case VK_STOP:
 // STOP button
 scene.lastPlaybackButtonPressed = 'STOP';
 break;
 case VK_FAST_FWD:
 // FFWD button
 scene.lastPlaybackButtonPressed = 'FFWD';
 break;
 case VK_REWIND:
 // RWD button
 scene.lastPlaybackButtonPressed = 'RWD';
 break;
 case VK_0:
 // 0 numeric button
 scene.lastNumericButtonPressed = '0';
 break;
 case VK_1:
 // 1 numeric button
 scene.lastNumericButtonPressed = '1';
 break;
 case VK_2:
 // 2 numeric button
 scene.lastNumericButtonPressed = '2';
 break;
 case VK_3:
 // 3 numeric button
 scene.lastNumericButtonPressed = '3';
 break;
 case VK_4:
 // 4 numeric button
 scene.lastNumericButtonPressed = '4';
 break;
 case VK_5:
 // 5 numeric button
 scene.lastNumericButtonPressed = '5';
 break;
 case VK_6:
 // 6 numeric button
 scene.lastNumericButtonPressed = '6';
 break;
 case VK_7:
 // 7 numeric button
 scene.lastNumericButtonPressed = '7';
 break;
 case VK_8:
 // 8 numeric button
 scene.lastNumericButtonPressed = '8';
 break;
 case VK_9:
 // 9 numeric button
 scene.lastNumericButtonPressed = '9';
 break;
 default:
 // pressed unhandled key
 shouldRender = false;
 }
 if (shouldRender) {
 // render scene
 scene.render();
 }
 } catch (e) {
 // pressed unhandled key, catch the error
 }
 // we return true to prevent default action for processed keys
 return true;
}
Observe that the key handler function code ends with returning true to suppress the default behaviour of the terminal for the pressed RC button.
The rc-interaction.js ends with app entry function:
// app entry function
function start()
{
 try {
 // attempt to acquire the Application object
 var appManager = document.getElementById('applicationManager');
 var appObject = appManager.getOwnerApplication(document);
 // check if Application object was a success
 if (appObject === null) {
 // error acquiring the Application object!
 } else {
 // we have the Application object, and we can initialize the scene and show our app
 scene.initialize(appObject);
 appObject.show();
 }
 } catch (e) {
 // this is not an HbbTV client, catch the error.
 }
}
This function tries to acquire the Application object and, when successful, initializes and shows it’s user interface (initial state set by CSS is app_area hidden, red button call-to-action banner visible).